
No matter what kind of camera you are using—your phone, tablet, or a digital camera (remember those?), there are a few key principles that always work to produce gorgeous pictures. Let’s brush up your photography skills with these simple tips.
#1 – It’s all about capturing the light.

Your garden may be bursting with lush colors, textures and layers, but if the lighting isn’t right, those details will be lost in the shadows. The best times to photograph your garden are: sunrise, sunset, just after sunset, just after a light rain, and on cloudy or overcast days. If it’s a bright sunny day, your photos will not turn out like you had hoped because the sun bleaches out soft colors and adds pockets of dark shadows. If the light isn’t right, wait to take your pictures.
#2 – It takes a steady hand.

Are your photos blurry or just not as crisp as you’d like? Pay close attention to keeping your hands steady when you snap your pics. One way to steady yourself is by pressing your elbows into your sides and planting your feet in the ground a bit wider than shoulder width apart, essentially becoming a human tripod. Another is to exhale just before you take the picture—this steadies your torso. If you’ve tried these simple tricks and they just aren’t cutting it, it may be time to invest in a tripod. Did you know they even make small, portable tripods for phones?
#3 – Use the rule of thirds.
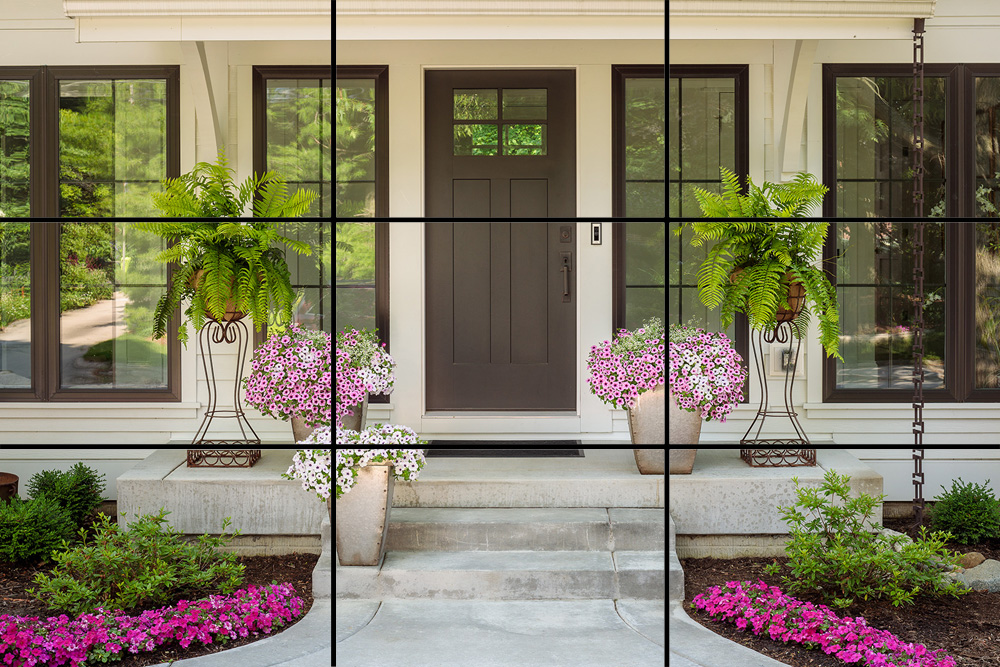
When you compose an image, use the rule of thirds. The basic idea is to break down the image into 9 parts by dividing it with two horizontal and two vertical lines. If you are using an iPhone, you can change your settings so that this grid automatically appears when you open your camera app. Having those guidelines makes it much easier to photograph the scene straight. Position your points of interest at the intersections of the gridlines or along those lines.
In this photo, the pots of Supertunias® are strategically placed at the intersections and along the gridlines. The photographer was also careful to position something of interest in the bottom left and right squares for balance. Having the gridlines present when taking the photo helped to make sure the structural lines of the home were straight as the shot was composed.
#4 – Choose your focus.

Have you ever tried to take a picture of a flower up close only to have it be blurred out with a crisp view of the mulch underneath? You need to tell your camera where you want it to focus. On your mobile phone, tap the spot in the frame that you want to be sharpest. When you do that, the camera will automatically adjust to make that spot clearly in focus. On a manual camera, look through the viewfinder and position the primary focus point on the item you want to be clearest. Depress the shutter release half way to make sure it’s right, then finish taking your shot.
#5 – Take a variety of pictures.
One of the nice things about taking images on your phone or digital camera is that you can take as many pictures as you’d like and easily delete the ones that didn’t turn out well. When you photograph your garden and your favorite plants in it, take a wide variety of pictures.
Stand back and take a picture of the whole plant in context with the others around it. Get closer to capture the intricate details of the flowers. Photograph the delicate flower buds or bold foliage. Walk around the plant to find its best side. Take both vertical and horizontal shots. When you are all done, go inside where the lighting is even and purge the bad pics, then share the good ones. If you’ve followed these five tips, there’s bound to be at least a few Insta-worthy images in the bunch!