How to Grow Clematis
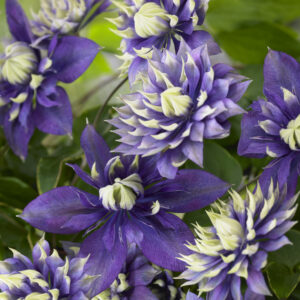
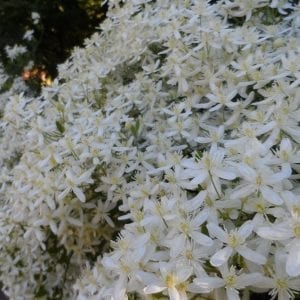
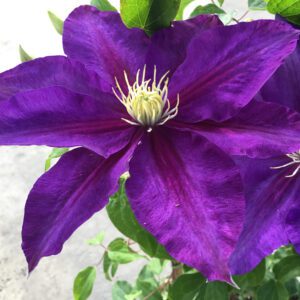
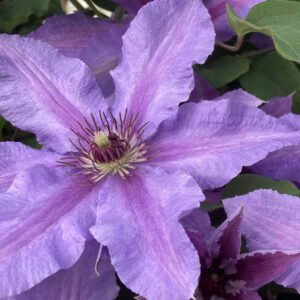
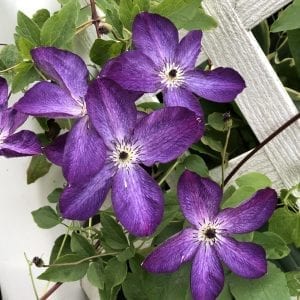
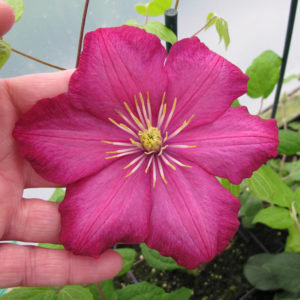
Gardeners have long adored clematis for its gorgeous blossoms that come in a vast array of colors, patterns and sizes. It’s one of our favorites too, which is why we’ve amassed such a large selection to share with our customers. Let us help you choose the best clematis for your space and give you a few tips for planting and maintaining these long-lived perennials so you can enjoy them to their fullest potential. Let’s get started!
Choosing the Best Clematis for Your Space
There are many different kinds of clematis vines, and we here at Garden Crossings offer one of the broadest selections you’ll find from a mail order source. Some grow as tall vines that will quickly scramble to the top of a tall trellis, while others that are intended for containers grow just a few feet tall.
Some clematis aren’t vines at all, but rather are bushy perennials that are semi-upright in habit unless they are grown up through an obelisk for support. Some can be used as a flowering groundcover or grown up through small trees or large shrubs. It’s important to know where you plan to grow your clematis so that you can pick out the best variety to fit your space.
Browse our extensive Clematis collection here. Remember, it’s always a good idea to order early for best selection.
What to Do When Your Clematis Arrives
As soon as your Clematis is delivered, open the box immediately and carefully unpack it. Your clematis will be ready for some fresh air and water when it arrives. Then, set it in a sheltered place outdoors (assuming temperatures are above 50°F) rather than putting it directly in the sun. That will help it become gently acclimated to your environment. If possible, plant your new clematis within a few days of receiving it, following the instructions below.
Where to Plant Your Clematis
The first thing to consider when choosing a spot to plant your clematis is how the variety you chose grows. If it is a tall, vining type, it will need a trellis, wire fence or other support that it can use to climb up. The slats of wooden lattice are too thick for a clematis’ stems to twine around. Provide a support no thicker than your pinky finger for best results.
If you are planting a short 3 to 5 foot tall variety of clematis, an obelisk, bamboo teepee or small trellis should be large enough to accommodate it. This kind of clematis makes a great thriller in large combination planters for your deck or patio or focal point in a perennial garden. Bush types of clematis also work with obelisks and bamboo supports, or they can be grown between other plants to lean on.
Tip: If you are local to our retail store in Zeeland, Michigan, stop by to see our fun selection of clematis supports, trellises and obelisks.
You’ll find that most clematis are listed as full sun to part shade plants. However, they will grow far more vigorously and bloom more profusely in full sun, meaning more than six hours of sun per day. This is especially true of clematis cultivars that have very full, double flowers since it takes a lot of energy from the sun to form all those petals.
It’s important to know when choosing a good spot to plant your clematis that you’ll need to allow room around it for something to shade its roots. Because clematis is shallow rooted and suffers when the soil is too warm and dry, planting something in front of it or around the base will help to shade the soil and keep it cooler. A good way to remember this is that clematis likes its “head in the sun and feet in the shade”.
How to Plant Clematis
Clematis is fairly adaptable to most soil types, but its ideal soil is one that is rich in humus or compost, is loose and well-drained, and has a neutral to slightly alkaline pH. Most people don’t garden in soil that is naturally like this, so some amending should be done to create the best home possible for your new clematis.
Start by using a shovel or auger to dig a hole that is two to three times wider and about twice as deep as the container it is growing in. You are making the hole wider now so that you can loosen up and enrich all the soil that will surround your clematis’ roots. Mix some humus, compost, or soil conditioner in with the soil you dug out at a ratio of about one half native soil to one half soil amendments. If your soil is acidic, also mix in some garden lime at this time, following the recommended rates on the package. This mix of enriched soil is what you will use to fill the hole back in when you plant your clematis.
Note: If you are growing your clematis in a container, use a high quality potting soil that is lightweight in texture. Follow the same directions for adding lime since most potting soils are slightly acidic in nature.
Clematis is different than other perennials in that it is best to plant it two inches deeper than it was growing in the original container. Doing so reduces the risk of clematis wilt and also helps to protect the roots from cold during the winter.
Your clematis was likely sold with a trellis attached. There is no need to remove it from the trellis before you plant, as doing so risks snapping its fragile stems. Instead, detach the trellis from the container, then carefully slip the plant and trellis out of the container. If the roots are tightly wound around the bottom of the root ball, gently loosen them up a bit before planting.
Next, scoop some of that enriched soil you mixed up back into the bottom of the hole and set your clematis and its trellis in so the top of the rootball is setting two inches lower than ground level. Then, backfill the hole with the enriched soil, pressing firmly around roots to eliminate any big air pockets. Water the plant to settle the soil and add more soil if needed.
Tip: Save the label that came with your clematis so you will remember its name. You’ll see why this is important in the pruning section below.
Why Is Mulch So Important for Clematis?
Once your clematis is planted, you’ll want to add a two to three inch layer of shredded hardwood, bark mulch or shredded leaves around your clematis’ roots. Take care not to let the mulch lie up against the plant’s stems since that can cause them to rot.
This is an important step because clematis’ roots grow shallow and are particularly sensitive to high temperatures and drought. Spreading mulch around the roots and planting something in front of your clematis to shade its base will help to keep the soil cooler, maintain a more consistent temperature, and retain moisture. If you allow the sun to beat down around the base of your clematis and dry out the soil, the plant will be weakened, won’t grow and bloom like it should, and will be more vulnerable to disease.
Ongoing Maintenance for Clematis
The most difficult parts about growing clematis are now done! You’ve selected the best variety for your space, given it the support it needs, planted it properly and spread a cool layer of mulch at its feet. Starting the plant off right like this will help it to thrive for years to come.
Clematis prefers moist but not wet soil, so be sure to water it if you are experiencing hot weather or dry spells with no rain in the forecast. If you have your irrigation system set to water the rest of your garden every few days, that should be enough for your clematis, too.
Clematis does not require much fertilizer to keep it healthy and blooming strong. Topdressing the soil with compost or manure once each spring is generally sufficient. Alternatively, you could mix slow release fertilizer like Rose-Tone® into the soil once the plant starts growing in spring.
How to Prune Clematis
Clematis are like hydrangeas in that different kinds bloom on old or new wood, and that affects when they should be pruned. That’s why it is important to save the label that comes with your clematis—that way, you’ll know its name and can look up the proper pruning time if you forget next year.
On every Clematis plant record on our website, we list the “Blooms On” time—this year’s growth (meaning new wood), last year’s growth (meaning old wood) or both types of growth. We also list the “Prune Group” on every clematis plant record. Check that feature out on ‘Dr. Ruppel’ clematis, for example.
Just like hydrangeas, if you prune a clematis that blooms on old wood in the fall or spring, you will be pruning off the spring flower buds. But if your clematis blooms on new wood, the buds won’t have formed yet in the fall or spring, so it can be safely pruned then.
Pruning groups are helpful because they give specific instructions on how and when to prune your clematis. Check to see which group the variety you are growing belongs to, then follow these guidelines.
Clematis Pruning Group 1:
Varieties in this group set their flower buds on the previous season’s growth (the old wood). You don’t need to prune them at all for them to grow, but if you want to prune, wait until their spring flower show is finished and then do so by pruning down to a healthy set of buds. Most of the time with this type of clematis, you’ll only need to remove the weak or dead stems.
Clematis Pruning Group 2:
Varieties in this group usually bloom twice—first on the previous season’s growth (old wood) in the spring and then again in the summer or fall on this season’s growth (new wood). Because they almost always have buds present, it’s best to only prune these types of clematis to shape if needed. If you want to stimulate new growth at the top to make your clematis grow taller, trim back the top 12 inches of growth above the largest leaf buds in early spring. Weak or dead stems can be removed any time.
Clematis Pruning Group 3:
Varieties in this group only set their flower buds on this season’s growth (new wood). Since no flower buds are yet present in the fall or spring, you won’t eliminate any flowers if you prune the whole plant back to about three feet tall in early spring. Be sure to leave at least one pair of strong looking leaf buds on each stem you prune back. The vines will grow vigorously to fill right back in where they were last year and bloom later in the summer.
A Special Note About Pruning New Clematis
Within the first year of planting your new clematis, we recommend pruning it down to a height of 12 inches using the timing explained in the pruning groups above. If you do so, you’ll be helping your brand new plant establish a strong root system, setting it up for a lifetime of healthy, robust growth. You might need to sacrifice a few blooms in the process that first year, but it will be worth it in the long run.
Can I Prune My Clematis Down to the Ground?
This is a question we hear often from people who have an old, overgrown clematis in their garden. If your clematis is looking unkempt and has a lot of bare, woody growth at the base, you can perform what is known as “renovation pruning”. You will likely eliminate the flower buds for the season in the process, but your plant will end up much healthier overall. Renovation pruning should be done in early spring and should not be done more than every three to five years.
Look carefully for at least one or two pairs of strong leaf buds low on the stems, then make your cuts just above them and remove all the top growth. Afterwards, feed the plant with water soluble fertilizer to encourage a fresh new flush of growth. Remember to keep the soil moist and the clematis’ roots cool so it has the energy to regenerate a new canopy of foliage.
Go further:
Showing 37–64 of 64 results

